dropad a8 android tablet
Dropad A8 Review – Android Tablet from Dealextreme

For those who want to buy a good Android tablet, the Dropad A8 is a good one (also know as A8i) and can be purchased at DealExtreme. It comes with Android 2.2, but it possible to update...

invisible ink pen with uv light
Invisible Ink Pen with UV Light

This invisible ink pen (sku.88) is a funny and useful product sold at Dealextreme (and some others stores). With it, you can write hidden messages on a paper and then, when you...

final fantasy buster sword cloud keychain
Final Fantasy Keychains Review (Mini Alloy Weapons from Dealextreme)

In this review we would like to talk about some Final Fantasy keychains (and some cell phone straps too) that we bought at Dealextreme. For those not familiar, Final Fantasy is...

fullmetal alchemist pocket watch
Fullmetal Alchemist Pocket Watch Review

This pocket watch (sku.45307) is specially for Fullmetal Alchemist fans (anime/manga). It is a replica of the silver pocket watch used by the character Edward Elric...

usb 3.0 flash drive 16gb adata
USB 3.0 Flash Drive 16GB Review (ADATA S102)

This USB 3.0 Flash Drive 16GB (sku.103478) is a genuine ADATA S102 device (according to Dealextreme) with read and write speeds of 64 Mbps and 30 Mbps respectively...

Wamo Pro Bluetooth Controller Review

wamo pro bluetooth controller review ios android gamepad wamo pro bluetooth controller review ios android gamepad wamo pro bluetooth controller review ios android gamepad wamo pro bluetooth controller review ios android gamepad wamo pro bluetooth controller review ios android gamepad wamo pro bluetooth controller review ios android gamepad wamo pro bluetooth controller review ios android gamepad wamo pro bluetooth controller review ios android gamepad wamo pro bluetooth controller review ios android gamepad wamo pro bluetooth controller review ios android gamepad wamo pro bluetooth controller review ios android gamepad wamo pro bluetooth controller review ios android gamepad


A few days ago we wrote a IPEGA PG-9017 review, which helped some customer to know the device better. We recommend that you read it, because there may be some useful information (including comments) that you won't find in this review.

This time, we would like to review the Wamo Pro, another Bluetooth controller (Xbox 360 controller/Moga Pro comfortable ergonomic design) that works with Android, iOS and PC. This Bluetooth gamepad also has an extensible grip to support different smartphone sizes.

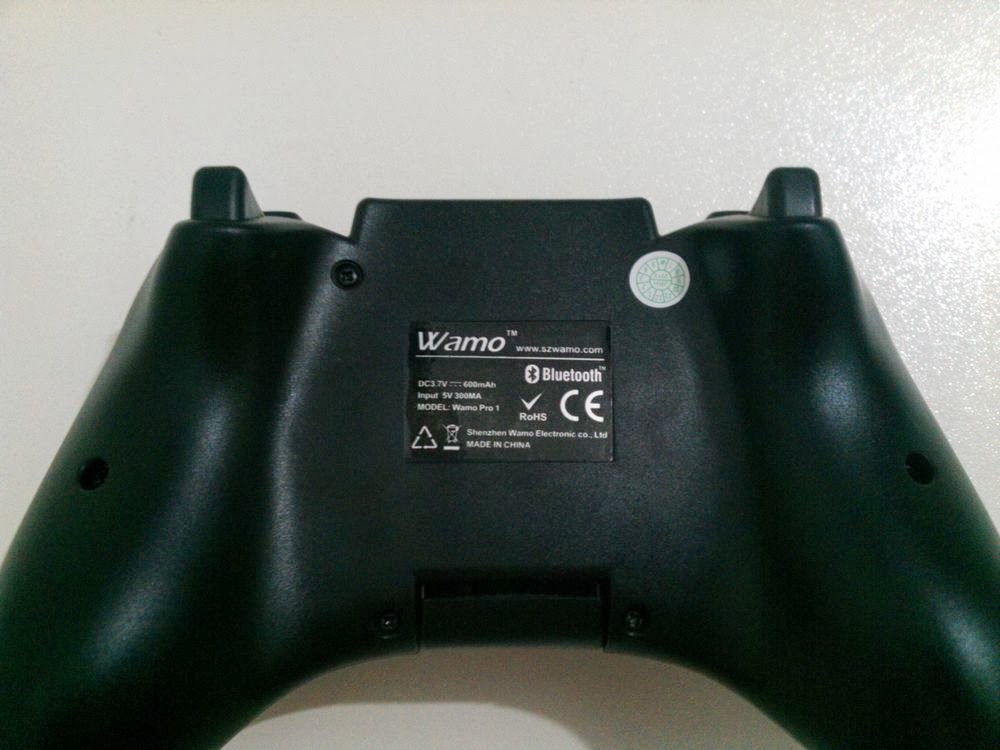
The Wamo Pro is manufactured by "SZ Wamo" and was bought on Dealextreme (sku.222605). The package came with the following items:

  • 1x Wamo Pro Bluetooth controller.
  • 1x ~148cm USB cable (used to recharge the Bluetooth gamepad or to update the Wamo Pro firmware).
  • 1x User manual (English and Chinese).


Features of the Wamo Pro

  • 4 modes of use: Gamepad, Keyboard, App and iOS (details later).
  • GREAT dpad, analogs and buttons quality.
  • Extensible grip (9cm).
  • Bluetooth 3.0 (it works with older Bluetooth devices too).
  • 6~8 meters of wireless range.
  • Compatible with iOS and Android smartphones and tablets.
  • Compatible with PC (tested on Windows 7).
  • 500mAh built-in lithium battery.
  • Buttons: A, B, X, Y, LB, LT, RB, RT, Select, Start, L3, R3 and HOME.
  • Pads: one D-Pad and two Analogs.
  • Material: plastic.

Check our YouTube channel for more Wamo Pro videos.


Will my smartphone fit in the Wamo Pro grip?

wamo pro extensible grip

The Wamo Pro grip (or clamp/holder) extension is limited, so you only will be able to attach smartphones whose width is around 9cm. If your smartphone width (smartphone + case thickness) is bigger than that (is there any?), then you will not be able to use this wireless Bluetooth controller, at least not using the grip.


How to use the Wamo Pro Bluetooth Controller

As with IPEGA PG-9017, this Android Bluetooth controller (also works on iOS) only requires a device with Bluetooth in order to work. However, in practice, there may be compatibility issues, so you would have to seek solutions on Internet forums or developers.

Below we will explain the usual way of use, which should be enough for most of the owners. After that, we will put some extra information regarding workarounds and apps that may help you in case of problems while connecting the Wamo Pro to your smartphone. So, to connect Wamo Pro to your Android smartphone do the following:

Step 1: Download and install "Wamo Ground" app from SZ Wamo's website (see note 1).
Step 2: Open "Wamo Ground" (see image 1).

wamo pro bluetooth controller wamo ground app

Step 3: Click on "My equipment" in the lower menu (see image 2 and note 2).

wamo pro bluetooth controller wamo ground app

Step 4: Hold down X button for "GAMEPAD MODE" (others buttons start others modes - details in the next section).
Step 5: Still holding the before button, hold down HOME button until lights start blinking.
Step 6: Release both buttons.
Step 7: Back to "Wamo Ground" app, click on the Bluetooth ON button in case Bluetooth is off (see image 3).

wamo pro bluetooth controller wamo ground app

Step 8: Click on "Add equipment" (see image 4).

wamo pro bluetooth controller wamo ground app

Step 9: App will list any equipment around, including WamoPro (with MAC address). Click on "Binding" button related to your WamoPro device (see image 5).

wamo pro bluetooth controller wamo ground app

Step 10: After successful connection, the first light will stay on (others modes have others light combination) and app will open a test screen so you can check if the Bluetooth gamepad are working properly (press buttons to see a response).
Step 11: Close "Wamo Ground" app by pressing BACK or HOME button.
Step 12: Open your prefered app/emulator and map buttons according as you prefer.

Case you have problems even following those steps, know that there are some useful apps that may help you. One of them is the custom Bluez IME with support to Wamo Pro (only in GAMEPAD mode for now). For us, it helped fix some connectivity problems with the HTC Desire HD (ROM ViperDHD v2.2.0). This custom Bluez IME also has support to IPEGA PG-9017 thanks to DiegoBaeza.

Others apps (for Android) that may help you are:

  • GameKeyboard: Useful to play touch-only games with physical gamepad (and other things).
  • Mupen64+ AE: Inside this Nintendo 64 emulator there is a diagnostic tool ("Settings" -> "Input" -> "Controller" -> "Controller diagnostics") to help you test gamepads.
  • Tincore Keymapper: Useful to play touch-only games with physical gamepad.
  • Wamo Key IME: Similar to GameKeyboard, but with less options (SZ Wamo's app).
  • MOGA VK: Case a game/app itsn't compatible with Wamo Pro (though compatible with keyboard) or you want to remap buttons.


Which MODE should I use?

For retro games that don't need analog stick, such as Super Nintendo (SNES), Nintendo (NES), Master System, Mega Drive (Genesis) and Arcade, KEYBOARD mode should be the simpler mode for you, but you can also use GAMEPAD or APP modes too since they have more buttons.

For retro games that use analog sticks, such as Nintendo 64 and Playstation (PSX), GAMEPAD or APP are recommended since both have 2 real analogs (emulator must be compatible with real analogs and Android 3.1+ are required).

For Android gaming, GAMEPAD or APP are recommended, but there may be cases that KEYBOARD mode may be useful (old games without current updates for instance).

For PC gaming, more specifically talking about retro gaming (emulators), GAMEPAD (see note 3) should be compatible with most of the emulators and has a lot of buttons. Switch to KEYBOARD mode in case your emulator is not compatible with POV Hat (Dpad won't work).

Now, case you want play real PC games, then search for X360CE to play games compatible with Xbox 360 controller and search for Xpadder to play games that aren't compatible.

Finally, for iOS games, SZ Wamo recommends iOS mode (button B), but they said that currenctly there are just a few games that support Wamo Pro device.

Mode Button
Gamepad X
Keyboard A
App Y
iOS B


Where can I buy this Wamo Pro?

This Wamo Pro Bluetooth controller is for sale at Dealextreme for about $30. You can also buy it on SZ Wamo's account in Taobao (Chinese website).


Note 1: SZ Wamo is planning to release an English version of "Wamo Ground" app. When they do, I will update this review.

Note 2: The English names used above was explain by a SZ Wamo employee during a chat. I don't know Chinese.

Note 3: In Windows 7, after finding WamoPro and before pairing, right-click on WamoPro, click on "Properties", click on "Services" tab and then enable "Drivers for keyboard, mice, etc (HID)" option.

Bluez IME with support to Wamo Pro (Android APK)

bluez ime icon

Update 18/08/2013: Added remap and profile function, just as in the other drivers.


In this post I will talk a little about the app Bluez IME and also about what I did to make it support Wamo Pro natively. Those who are having problems with the officials apps from SZ Wamo should read this post and try this custom app (it may not work too...).


After having some connectivity issues between my HTC Desire HD 4.0.4 (ViperDHD v2.2.0 ROM) and Wamo Pro Bluetooth controller, I decide to test alternative solutions. For my lucky, I found the source-code of the custom Bluez IME that supports IPEGA PG-9017 in joystick/gamepad mode (credits to DiegoBaeza). So, I got that source-code and added Wamo Pro driver to Bluez IME.

Unfortunally, I could only test this new Bluez IME in my HTC Desire HD, but I hope it helps anyone having problems to connect/play with Wamo Pro using official apps (although I didn't heard about anyone else).


How to connect Wamo Pro using Bluez IME

Before anything, you should download and install (Android only) the following apps:

If you have any previous Bluez IME already installed, you may need uninstall it before installing this new one to avoid conflicts.

Now, with the apps installed, do the following steps to connect Wamo Pro using Bluez IME:

Step 1: Open Bluez IME app.
Step 2: Click on "Activate Bluetooth" to turn it ON in case it is OFF (see image 1).

bluez ime support wamo pro bluetooth controller
Image 1

Step 3: Turn ON the Wamo Pro device (case it is OFF).
Step 4: Hold down X + HOME buttons in your Wamo Pro. Lights will start blinking (see note 1).
Step 5: Click on "Select device" and choose WamoPro (see image 2 and 3). If it is not in the list, click on "Scan..." to search and select it.

bluez ime support wamo pro bluetooth controller bluez ime support wamo pro bluetooth controller
Image 2 and 3

Step 6: Click on "Select device driver" and choose "Wamo Pro - X mode (HID)" (see image 4 and 5).

bluez ime support wamo pro bluetooth controller bluez ime support wamo pro bluetooth controller
Image 4 and 5

Step 7: Click on "Select IME" (remember which one is currenctly selected) and choose "Bluez IME" (see image 6 and 7). If it is not in the list, click on "Configure input methods", enable "Bluez IME" (see image 8), go back and select it now.

bluez ime support wamo pro bluetooth controller bluez ime support wamo pro bluetooth controller bluez ime support wamo pro bluetooth controller
Image 6, 7 and 8

After those steps the Bluez IME app will try to connect to Wamo Pro automatically. If success, a message saying "Connected to ..." will pop up, where "..." is the MAC address of your Wamo Pro. After that, you now are able to map buttons in your emulators and games (buttons should response as shown in the table on the next section).

In case you still have doubts on how to use Bluez IME, the video below showing the same steps described above.

After finish using Bluez IME, don't forget to turn it OFF and reselect your original IME (that one I told you to remember) in "Settings"->"Language & keyboard" menu.


Where can I buy this Wamo Pro?

The Wamo Pro Bluetooth controller is for sale at Dealextreme for about $30.


Technical Details

The Wamo Pro driver added to Bluez IME should only works with GAMEPAD mode (button X) and recognizes all buttons and pads according to Android API, which should output the following keycodes:

Button Constant Keycode
A KEYCODE_BUTTON_A 96
B KEYCODE_BUTTON_B 97
X KEYCODE_BUTTON_X 99
Y KEYCODE_BUTTON_Y 100
Select KEYCODE_BUTTON_SELECT 109
Start KEYCODE_BUTTON_START 108
L3 KEYCODE_BUTTON_THUMBL 106
R3 KEYCODE_BUTTON_THUMBR 107
LB KEYCODE_BUTTON_L1 102
LT KEYCODE_BUTTON_L2 104
RB KEYCODE_BUTTON_R1 103
RT KEYCODE_BUTTON_R2 105
Dpad: Down KEYCODE_DPAD_DOWN 20
Dpad: Left KEYCODE_DPAD_LEFT 21
Dpad: Right KEYCODE_DPAD_RIGHT 22
Dpad: Up KEYCODE_DPAD_UP 19
Left Analog: Left KEYCODE_A 29
Left Analog: Down KEYCODE_S 47
Left Analog: Right KEYCODE_D 32
Left Analog: Up KEYCODE_W 51
Right Analog: Left KEYCODE_4 11
Right Analog: Down KEYCODE_5 12
Right Analog: Right KEYCODE_6 13
Right Analog: Up KEYCODE_8 15

Note that, although analogs are show as digital output, Bluez IME also sends analogs signals too, so if one emulator/game is capable of interface with Bluez IME (like N64oid), then analog sticks will work as they should (non-digital). I don't know other apps that support Bluez IME interface, but I heard that GameKeyboard app also support analogs from Bluez IME.

Optionally, you can use the option "Configure key mapping" to map the buttons in a way different than the default (table above). This may be useful if a game (or emulator) doesn't support (or partially) Wamo Pro keycodes, but it supports keyboards or another gamepads (you can save custom mapping as profiles).

The APK was build with the following properties:

  • versionCode: 18.
  • versionName: 1.17.
  • debuggable: true.
  • testOnly: false.


Note 1: Make sure to hold X button first or else Wamo Pro may start without any mode selected (lights will blink slower).

IPEGA PG-9017 Wireless Bluetooth Controller Review (Android / iOS)

ipega bluetooth controller review ios android gamepad ipega bluetooth controller review ios android gamepad ipega bluetooth controller review ios android gamepad ipega bluetooth controller review ios android gamepad ipega bluetooth controller review ios android gamepad ipega bluetooth controller review ios android gamepad ipega bluetooth controller review ios android gamepad ipega bluetooth controller review ios android gamepad ipega bluetooth controller review ios android gamepad ipega bluetooth controller review ios android gamepad ipega bluetooth controller review ios android gamepad ipega bluetooth controller review ios android gamepad ipega bluetooth controller review ios android gamepad ipega bluetooth controller review ios android gamepad ipega bluetooth controller review ios android gamepad


In this review, we would like to talk about the IPEGA PG-9017, a Bluetooth controller specially designed for Android and iOS smartphones, such as iPhone, Samsung Galaxy S II, HTC One S, Samsung Galaxy Nexus, Motorola Droid Razr and many others. The reason for this is that the IPEGA PG-9017 has an extendable grip to support different smartphone sizes (below we talk about limits), so you can attach you smartphone, synchronize devices through Bluetooth and play your favorite games using a gamepad.

By the way, our IPEGA PG-9017 was bought on Dealextreme (sku.172963) and the package came with the following items:

  • 1x IPEGA PG-9017 Bluetooth controller.
  • 1x 85cm USB cable (used to recharge the Bluetooth gamepad).
  • 1x User manual (English and Chinese).


Features of the IPEGA PG-9017

  • 4 modes of use: iCade, Mouse, Keyboard and Joystick (details later).
  • Bluetooth 3.0 (it works with older Bluetooth devices too).
  • 6~8 meters of wireless range (useful if the grip will not be used).
  • Compatible with iOS and Android tablets and smartphones (it worked on Windows 7 too).
  • Built-in lithium battery.
  • Buttons: A, B, X, Y, L, R, Select, Start and HOME.
  • Pads: one D-Pad and two Analogs (true analogs when in JOYSTICK mode - see note 1).
  • Power saving mode when no use.
  • Material: plastic
  • Offered in two colors: black or white (links below).

Check our YouTube channel for more IPEGA PG-9017 videos.


Will my smartphone fit in the IPEGA PG-9017 grip?

ipega pg-9017 bluetooth controller grip

As you can see on the picture above, the IPEGA PG-9017 grip (or clamp/holder) extension is limited, so you only will be able to attach smartphones with width around 7.5cm. If your smartphone width (smartphone + case thickness) is bigger than that, then you will not be able to use this wireless Bluetooth controller. However, there are workarounds, like the guy in this video who managed to attach a Samsung Galaxy Note (8.3 cm of width) to the IPEGA PG-9017 using a plastic case mod. Also, there is the option to use this wireless Bluetooth controller without the grip, which is the option for those who have tablets (Android or iPad).


How to use the IPEGA PG-9017 Bluetooth Controller

In order to use this Android Bluetooth controller (also works on iOS), you only need to own a device with Bluetooth. However, not every device will pair with the IPEGA PG-9017 due to some Android bugs. For instance, this Bluetooth gamepad did not work with the HTC Desire HD running Android 2.3.3. However, after installing the Blackout v3.2 ICS ROM (Android 4.0.4), they worked fine. So, try to find information from other IPEGA PG-9017 owners on the Internet or buy it and try for yourself.

Getting back to the how-to, follow the steps below to pair and connect IPEGA PG-9017 to your Android smartphone (iPhone, iPad and iPod should be similar):

Step 1: Make sure the Bluetooth gamepad is OFF (SEARCH LED should be off). If on, hold HOME button for a few seconds to turn it off.
Step 2: Attach the smartphone in the Bluetooth gamepad grip.
Step 3: Go to Bluetooth settings of your smartphone and turn on Bluetooth.
Step 4: Now, depending on the mode you want turn it on, hold down A, B, X or Y (details in the next section).
Step 5: Still holding one of those four buttons (ABXY), hold down HOME button for a few seconds until the SEARCH LED start blinking, which means the Android controller is on and searching for devices to pair.
Step 6: Now, release the pressed buttons, get back to the smartphone screen and click on the option to scan for Bluetooth devices. That option may be hidden depending on Android version, so maybe the MENU button of your smartphone can help.
Step 7: After finding the IPEGA PG-9017, your smartphone will list a new device: "Bluetooth Gamepad".
Step 8: Touch this new item. A menu will popup asking for pair. Just confirm the pairing process and wait for conclusion.
Step 9: After successful pairing, wait again until your Android smartphone try to connect to Android gamepad automatically. If it fails, see note 2.
Step 10: After successful connecting (SEARCH LED will stay on and smartphone will mark this Android gamepad as connected), you are ready to try to use this Android gamepad with your game or emulator. If it fails connecting, see note 2.

The next part is to try to use IPEGA PG-9017 wireless Bluetooth controller with your game or emulator. Most of the retro emulators (for SNES, Mega Drive, Nintendo 64, Playstation, NES, Master System, Arcade, Neo Geo, etc.) allow you to configure a Bluetooth controller, at least in KEYBOARD mode. However, just a few Android games accept these Bluetooth controllers (currently), so you will have to try the modes until find something playable. By the way, make sure to unpair, turn off, turn on in other mode and pair again the IPEGA PG-9017 to avoid Bluetooth bugs. If Android do not unpair it in either way, reboot your smartphone.


Which MODE should I use?

As we mentioned, the IPEGA PG-9017 has 4 modes of use: Joystick, Keyboard, iCade and Mouse. You pick one of them when turning on this Bluetooth gamepad. Just hold down A, B, X or Y (according to the table below) and then hold HOME button for a few seconds (SEARCH LED will start blinking).

Each mode has some features, as shown in the table below, so try different ones when having problems while mapping button or testing games. As recommendation, start trying JOYSTICK mode. If no success, try the other modes. For Android users, there is an app on Google Play called GameKeyboard, who claims to allow users to play touch-only games with a gamepad (like this Bluetooth gamepad), but unfortunately we did not have a chance to test it (paid app).

To help you know the features of each mode, and which button (ABXY) to hold before turning on the wireless Bluetooth controller, we compiled the table below using the tool "Controller diagnostics" from Mupen64 Plus AE Free (v2.2.0), a Nintendo 64 emulator (go to "Settings" -> "Input" -> "Controller" -> "Controller diagnostics").

Mode Button Notes
Joystick X
  • true analogs
  • D-Pad and left analog are separated (different events)
Keyboard A
  • D-Pad and left analog are the same (no true analog)
  • no right analog
iCade Y
  • D-Pad and left analog are the same (no true analog)
  • no right analog
  • no START / SELECT (those two white buttons of a real iCade are not mapped)
Mouse B
  • L or R used as mouse click
  • right analog used to move mouse cursor
  • no left analog
  • no D-Pad
  • no ABXY buttons
  • no START / SELECT


Where can I buy this IPEGA PG-9017?

This IPEGA PG-9017 Bluetooth controller is for sale at Dealextreme for about $24. We bought the black version, but there is also a white version with the same features.


IPEGA PG-9017 compatibility list

Again, to help those looking for compatible games and emulators, we compiled the list below showing app/game name, version, notes, modes used, device and Android version. Obviously, it is a little list right now, but with your help it can get bigger and more accurate. Use the comments section below to share your experience with this Android Bluetooth controller.

Game/App (ver.) Notes Device
Mupen64 Plus AE (2.2.0) all OK (including true analogs) after mapping keys - JM Desire HD 4.0.4
(Blackout 3.2)
aFBA (1.6) all OK after mapping keys - KM *
Snes9x EX+ (1.5.10) all OK after mapping keys - KM *
GENPLUSDroid (1.9.3) all OK after mapping keys - JM and KM *
My Boy! Free (1.3.6)
GBA emulator
all OK after mapping keys - KM *
SuperGNES Lite (1.3.9) all OK after mapping keys - KM *
Sonic CD Lite (1.0.4) all OK - JM or KM *
Zenonia 4 (1.1.4) action button only in START - KM *
Zenonia 4 (1.1.4) ABXYLR, START and SELECT as action button - JM *
Avenger (1.04.00) only D-Pad works - JM or KM *
Assaulter (1.08.01) only D-Pad works - JM or KM *
Chrono & Cash Free (1.2.8) it seems ok - IM *
Recess Riot (1.2.1) holding buttons not handle properly - IM *
Mupen64 Plus AE (2.2.0) all OK (including true analogs) after mapping keys - JM Samsung Galaxy S II 4.0.3
Cordy (1.70) all OK - JM Desire HD 4.0.4
(ViperDHD 2.2.0)
Tiger Arcade (3.1.2) all OK after mapping keys and clearing unused buttons - KM *
N64oid (2.7) true analogs, but didn't recognize mapped D-Pad and right analog in game - JM *
N64oid (2.7) all OK with limitations (no true analogs, D-Pad and left analog are the same and no right analog) - KM *
FPse (0.11.87) no right analog, slow input handle in "Analog pad" and normal input handle in "Digital pad" - JM *
FPse (0.11.87) all ok with limitations (no true analogs, D-Pad and left analog are the same and no right analog) - KM *

Legends:

  • JM -> Joystick Mode.
  • KM -> Keyboard Mode.
  • IM -> iCade Mode.
  • MM -> Mouse Mode.
  • * -> Same device as before.

Note that graphic, performance or sound problems are not in the scope of this IPEGA PG-9017 review.


Problems

Now we will list some problems that we found while using this wireless Bluetooth controller:

  • Stiff D-Pad (not a big problem for most of the games).
  • Stiff analog sticks (maybe they will be more flexible with use).
  • Low visibility by developers (currently), but probably more games/apps will be compatible with IPEGA PG-9017 in future.
  • iCade mode does not have mapped those two white buttons of the real iCade.


IPEGA PG-9017 Information for Developers (for Android)

In order to help Android developers to add IPEGA PG-9017 support in their games and apps (show this table to your prefered developers), we compiled the table below with information regarding KeyEvent and MotionEvent classes (comment if something is missing).

If you are an Android developer and need a tester who owns the IPEGA PG-9017, feel free to contact us by email or comment below.

KeyCode

/

Button

Mode
  Keyboard Joystick iCade (Down/Up)
A 38(J) 189(Button 2) 49(U)/34(F)
B 39(K) 190(Button 3) 36(H)/46(R)
X 41(M) 191(Button 4) 38(J)/42(N)
Y 37(I) 190(Button 3) 53(Y)/48(T)
L Shoulder 45(Q) 192(Button 5) 37(I)/41(M)
R Shoulder 44(P) 193(Button 6) 39(K)/44(P)
Select 46(R) 196(Button 9) -
Start 53(Y) 197(Button 10) -
D-Pad Up 19(DPAD_UP) AXIS_HAT_Y(-) 51(W)/33(E)
D-Pad Down 20(DPAD_DOWN) AXIS_HAT_Y(+) 52(X)/54(Z)
D-Pad Left 21(DPAD_LEFT) AXIS_HAT_X(-) 29(A)/45(Q)
D-Pad Right 22(DPAD_RIGHT) AXIS_HAT_X(+) 32(D)/31(C)
L-Analog Up 19(DPAD_UP) AXIS_Y(-) 51(W)/33(E)
L-Analog Down 20(DPAD_DOWN) AXIS_Y(+) 52(X)/54(Z)
L-Analog Left 21(DPAD_LEFT) AXIS_X(-) 29(A)/45(Q)
L-Analog Right 22(DPAD_RIGHT) AXIS_X(+) 32(D)/31(C)
R-Analog Up - AXIS_RZ(-) -
R-Analog Down - AXIS_RZ(+) -
R-Analog Left - AXIS_Z(-) -
R-Analog Right - AXIS_Z(+) -


Note 1: For Android users, it is required that your device has Android 3.1 or higher to support analog sticks. Check our YouTube video showing the IPEGA PG-9017 being tested in all 4 modes.

Note 2: As we already mentioned, not every device will work with IPEGA PG-9017. If you are an unlucky whose smartphone failed to pair or connect to this Android gamepad, and you really want to use it, try to search for official or unofficial Android ROM's, as it worked for our HTC Desire HD running Android 2.3.3.

VAP11G WiFi Bridge Review (LAN to Wireless adapter)

vap11g wifi bridge review lan wireless vap11g wifi bridge review lan wireless vap11g wifi bridge review lan wireless vap11g wifi bridge review lan wireless vap11g wifi bridge review lan wireless vap11g wifi bridge review lan wireless vap11g wifi bridge review lan wireless vap11g wifi bridge review lan wireless vap11g wifi bridge review lan wireless vap11g wifi bridge review lan wireless


In this review, we would like to talk about the VAP11G (bought on Dealextreme), a WiFi bridge that can be used as a LAN to wireless adapter. For instance, lets say that you have a 1080p media player capable of connect to Internet only through LAN port (Ethernet interface - RJ45). Configuring the VAP11G to connect automatically to your WiFi network and then plug it in the LAN port (media player in this example), makes possible to the media player connect to Internet wirelessly (presuming that your WiFi network is working properly). For better understanding, check the image below.

vap11g wifi bridge scheme

The VAP11G is compatible with a lot of devices with LAN port, such as IP camera, smart TV, Xbox 360, Playstation 3 (PS3), Playstation 2 (PS2), DVB set top box, satellite receiver, TV receiver, bluray player, media player and computer (laptop or desktop). Instructions for install and use (specially supplying power for it) will be shown further in this VAP11G review.


Features of the VAP11G

Below are some of the features of the VAP11G WiFi bridge (check DX product's page for more details):

  • LAN to wireless adapter (aka LAN to WiFi, LAN to WLAN, Ethernet to WiFi and Ethernet to wireless).
  • 1x DC 2.0mm female power port. (*)
  • 1x DC 2.0mm male power connector. (*)
  • 1x DC 2.0mm female to USB extension.
  • IEEE 802.11g/b compliant (VAP11N is IEEE 802.11n compliant).
  • Compatible with WEP (64 bit and 128 bit), WPA and WPA2 security access.
  • Supports SSID broadcast.
  • Supports any VoIP ATAs and VoIP phone.
  • Dimensions: 1.5cm x 4.5cm x 9cm.


Where can I buy this VAP11G (LAN to Wireless adapter)

This Vonets VAP11G WiFi bridge is for sale at Dealextreme for about $25, more specifically in this link.


Tutorial: How to Setup the Vonets VAP11G

In order to use the VAP11G, you must follow these 3 steps:

  • Install the software (CD included).
  • Configure the VAP11G using that software.
  • Plug the VAP11G properly in your LAN device (use only one power supply method).

Case you need help, following are the detailed instructions for installing, configuring and using the VAP11G.

Installing the Software (CD included)

There is no secret in this step: just insert the CD in your computer, execute the installer (if autorun is disabled) and follow the install wizard. Just pay attention to two things:

  • VAP11G software only works on Windows (required for configuration only).
  • During installation, install wizard will ask if Winpcap must be installed too - yes, it should (as shown here).

Configuring the VAP11G (using software)

After installation, plug VAP11G to the LAN port (motherboard or PCI card), power the VAP11G using the USB extension (connect to a USB port of your computer) and execute VAP11G software. Now, follow these steps:

  • Step 1: Select the WiFi bridge (VAP11G) connected to PC (as in this image). Use the refresh button case show none. If more than one are shown, confirm the MAC address by looking on the back of the VAP11G.
  • Step 2: After clicking on "Next", select your WiFi network (check the SSID) and click on "Next" (as shown here). Also, WiFi network data (SSID and channel) can be put manually in case SSID broadcast is enabled (network is hidden).
  • Step 3: Now, put the WiFi password (if there is one) and "Next" again (as in this image).
  • Step 4: Confirm the configuration and click on "Next" to finish (VAP11G software will show this screen).

Using the VAP11G

Now that configuration was finished, plug the VAP11G in your device with LAN port (IP camera, media player, gaming console, etc.). Also, power the VAP11G, but you have 3 ways to do that (choose only one):

  • Using the USB port (most common).
  • Using the DC 2.0mm male power connector.
  • Using a DC 2.0mm power adapter (not included).

Again, you must choose only one method to power the VAP11G.

Regarding the WiFi range, it is not great, but probably will fit for in-home use.


Note 1: According to the VAP11G box.