dropad a8 android tablet
Dropad A8 Review – Android Tablet from Dealextreme

For those who want to buy a good Android tablet, the Dropad A8 is a good one (also know as A8i) and can be purchased at DealExtreme. It comes with Android 2.2, but it possible to update...

invisible ink pen with uv light
Invisible Ink Pen with UV Light

This invisible ink pen (sku.88) is a funny and useful product sold at Dealextreme (and some others stores). With it, you can write hidden messages on a paper and then, when you...

final fantasy buster sword cloud keychain
Final Fantasy Keychains Review (Mini Alloy Weapons from Dealextreme)

In this review we would like to talk about some Final Fantasy keychains (and some cell phone straps too) that we bought at Dealextreme. For those not familiar, Final Fantasy is...

fullmetal alchemist pocket watch
Fullmetal Alchemist Pocket Watch Review

This pocket watch (sku.45307) is specially for Fullmetal Alchemist fans (anime/manga). It is a replica of the silver pocket watch used by the character Edward Elric...

usb 3.0 flash drive 16gb adata
USB 3.0 Flash Drive 16GB Review (ADATA S102)

This USB 3.0 Flash Drive 16GB (sku.103478) is a genuine ADATA S102 device (according to Dealextreme) with read and write speeds of 64 Mbps and 30 Mbps respectively...

Showing posts with label computer. Show all posts

Freelander PH20 Review (cheap Android tablet)

freelander ph20 review android tablet freelander ph20 review android tablet freelander ph20 review android tablet freelander ph20 review android tablet freelander ph20 review android tablet freelander ph20 review android tablet freelander ph20 review android tablet freelander ph20 review android tablet freelander ph20 review android tablet freelander ph20 review android tablet freelander ph20 review android tablet freelander ph20 review android tablet freelander ph20 review android tablet freelander ph20 review android tablet freelander ph20 review android tablet freelander ph20 review android tablet freelander ph20 review android tablet freelander ph20 review android tablet freelander ph20 review android tablet freelander ph20 review android tablet freelander ph20 review android tablet freelander ph20 review android tablet


Presentation of the Freelander PH20

In this review, we would like to talk about the 7 inch Android tablet Freelander PH20 that we bought on Dealextreme (sku.166593). We will detail its specs and features later in this review, but for now you should know its price: about $67. Obviously, for this price it is not a top Android tablet, but it performs very well when playing videos or running Android games (continue reading this Freelander PH20 review for details), so consider it as a purchase option.

Besides the Freelander PH20 tablet (SXZ-PH20 - Link-create manufacturer), the package also include the following items:

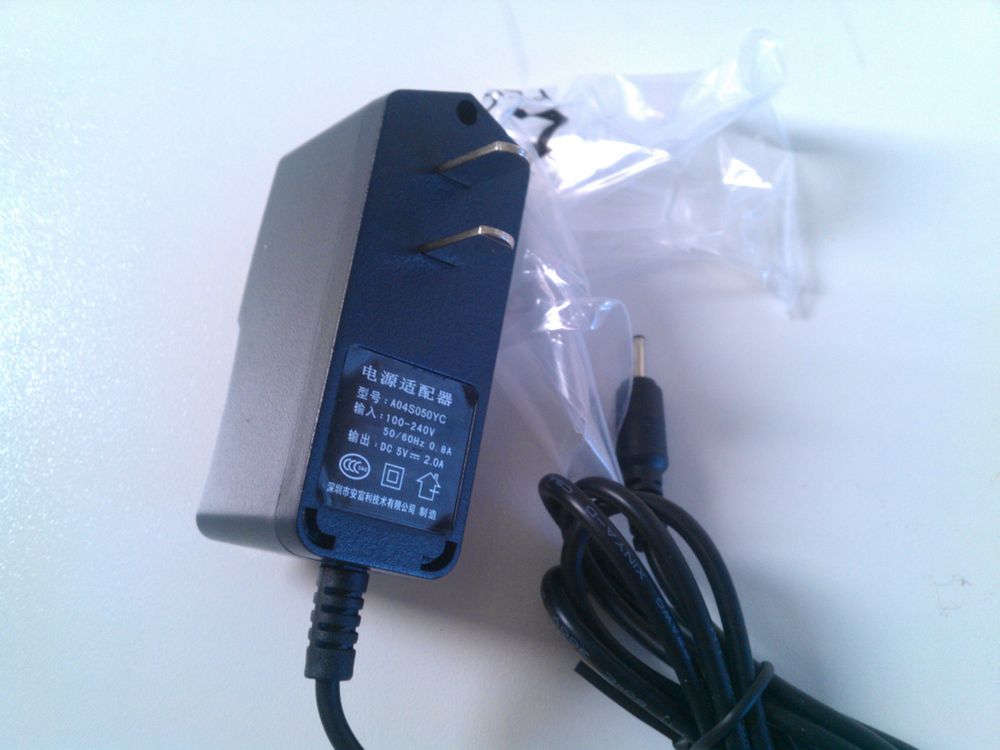
  • 1x Power Supply DC 5V (to recharge).
  • 1x USB OTG adapter (micro B male to standard A female).
  • 1x USB cable (micro B male to standard A male).
  • 1x Start guide (English/Chinese).


Features of the Freelander PH20

Now, to help you know if this Android tablet is worth or not (considering the $67 price), let us describe its main features:

  • Android 4.0.4.
  • Single core AllWinner A13 SoC (CPU Cortex-A8 1.2GHz and GPU Mali-400).
  • 7 inch capacitive screen (5 points) 800x480 of resolution.
  • Memory 512MB DDR3 SDRAM.
  • WiFi 802.11 b/g/n.
  • Front camera 300KP.
  • G-Sensor.
  • 1x TF card slot (maximum 32GB micro SD).
  • 1x 3.5mm earphone jack.
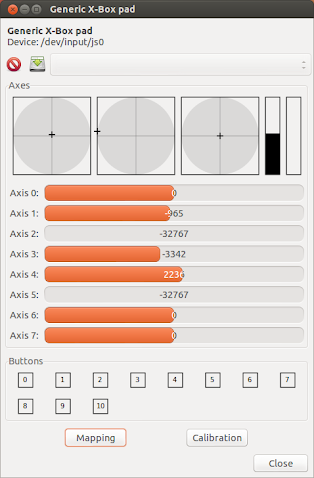
  • 1x USB OTG (supports external USB flash drive, hard disk, keyboard, mouse and some other devices). (*)
  • Rooted (checked with the app "Root Checker Basic").
  • Google Play store already installed.
  • 60 OS languages (the list of languages is shown on the overview video below).
  • Built-in speaker (good sound quality).
  • Built-in microphone.
  • Supports external 3G dongles. (**)
  • Power/Sleep button.
  • Volume up/down buttons.
  • Battery capacity 2800 mAh (3.7V Li-ion) about 3 hours of duration with WiFi on and playing YouTube video.
  • 19.1cm x 11.6cm x 1.2cm of dimensions.
  • 450g of weight.

In our opinion, it is a lot of things for a cheap Android tablet. However, as expected due to its price, it does not have some features that may be important for some. In our opinion, the main missing features are:

  • No HDMI output.
  • No Bluetooth (so far neither with a Bluetooth dongle).
  • No GPS (maybe it is possible to use a USB GPS dongle).
  • No official firmwares so far, but keep monitoring this thread. (***)
  • No custom firmware (we did not find any so far).

Just to clarify things, watch our overview video below showing some features of the Freelander PH20 tablet:


Freelander PH20 - Video Playback Test

As always when reviewing devices capable of play videos, we made (and recorded) some tests to know the video playback performance of the Freelander PH20 tablet.

The tests were put different (codec/format) video files to play and see how well it goes. Note that the ability to play or not a particular codec/format/subtitle is related to software, so installing a proper Android video player app should solve any problem that you may encounter (we used the native video player app). Our tests was intended knowing how well the system can handle video files (1080p, 720p, MP4, etc.), so it is more related to CPU, GPU and firmware.

Check the results for yourself on the video below:

As you probably saw above, all video files played smoothly on the Freelander PH20 tablet.

The formats/codecs of the videos used on the tests was (listed in order of appearance):

  • AVI (AVC/H264) 1280x720 bitrate 4273 Kbps 30 fps.
  • M2TS (AVC/H264) 1920x1080 VBR maximum 25000 Kbps 23.976 fps.
  • MP4 (AVC/MPEG-4) 1920x816 VBR maximum 40000 Kbps 23.976 fps.
  • WMV (VC-1) 1280x720 bitrate 8000 Kbps 29.97 fps.


Freelander PH20 - Gaming Performance Test

Now the part that almost everyone likes: games. For these tests, we chose some free 2D and 3D games available on Google Play (we also used some pre-installed games) to see how well the Freelander PH20 can run them. You can check the gaming performance on the video below:

The games used on the video above are (it runs smoothly if there is no note):


Freelander PH20 - External Devices Test

Since this Android tablet has a USB OTG, you can plug in a USB flash drive (will be mounted at "/mnt/usbhost1"), as you probably saw on the video playback test above, and some other devices. The other ones that we tested was a mouse, a USB 3.0 flash drive (works as USB 2.0), a regular keyboard and a keyboard with a leather case for tablets. All of them worked fine.

We also tried to connect a Bluetooth dongle, just as we did with the Dropad A8, but no success. Maybe it will work in some future firmware (original or custom).


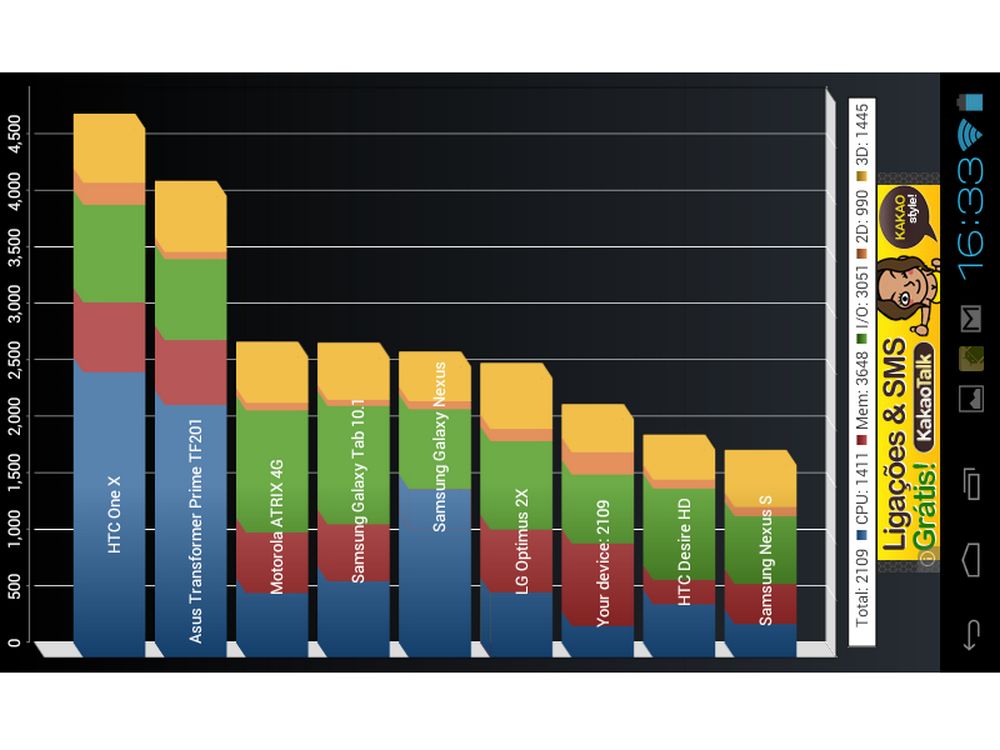
Freelander PH20 - Benchmark Test (AnTuTu, Quadrant and others)

Finally, we tested the Freelander PH20 tablet using some popular Android benchmark apps to see how it scores (points or fps). You can check the Android benchmark apps and the results below or check the detailed benchmark tablet scores on the image gallery at the beginning of this Freelander PH20 review.

  • AnTuTu Benchmark (v3.2.1): 3772.
  • Quadrant Standard Edition (v2.1.1): 2109.
  • Vellamo Mobile Benchmark (v2.0.2): 538 in HTML5 and 187 in METAL.
  • Neocore (v1.9.41): 57.3 fps.
  • NenaMark2 (v2.4): 31.5 fps.


Where can I buy this Freelander PH20?

This cheap Android tablet is for sale at Dealextreme for about $67, more specifically in this link.


Note 1: There may be some incompatible devices.

Note 2: The list of compatible 3G dongles is in one image at the gallery above.

Note 3: It seems there are 3 (three) versions of this tablet: PH20W, PH20L and PH20. You can check the version on the back of the tablet (that code on the corner). We received the PH20L (check image gallery above), which currently do not have firmware updates.

Tutorial: How to Connect the Xbox 360 Controller to Ubuntu

tutorial logo


If you follow this blog, you know that we already wrote a tutorial explaining how to connect the Xbox 360 controller to Windows. This time, we will explain how to connect the Xbox 360 controller to Ubuntu, but it is probably similar to other Linux distributions. By the way, it would be good if you read our Xbox 360 wireless receiver review, where you will know more about the Xbox wireless receiver before reading this tutorial.

Case you still do not have a Xbox 360 wireless receiver, you can buy it on Chinabuye for about $10.


What are the requirements?

Since kernel 2.6.26, official Ubuntu already comes with the xpad module, so the Xbox 360 wireless receiver should work as you plug it on a USB 2.0 port. However, to avoid compatibility problems and to ease the use/configuration, we recommend an alternative driver to connect the Xbox 360 controllers. Also, there are tools on the package "joystick" to test and calibrate the Xbox 360 wireless controllers, however we recommend to you use an alternative solution (explained below) since it is easier to use and has more compatibility with receivers (this one worked fine).

The complete list of requirements that must be satisfied before proceeding on the tutorial are:

  • Install some required packages.
  • You must have at least one Xbox 360 wireless controller.
  • You must have one Xbox 360 wireless receiver.
  • Your PC must have one USB 2.0 port ready to be used.


Installing the required packages

To install and configure the required packages to use the Xbox wireless receiver with wireless controllers, follow these steps:

Step 1: Open the terminal (Ctrl + Alt + T).

Step 1.1 (optional): To check if the Xbox wireless receiver is connected to a USB 2.0 port, run the command

       lsusb

It should show, besides other things, something like this:

       "Bus 002 Device 006: ID 045e:0291 Microsoft Corp. Xbox 360 Wireless Receiver for Windows".

Step 2: Run the following command

       sudo apt-get install --install-recommends jstest* joystick xboxdrv

Wait until the installation of the required packages be completed. Now you are able to use the Xbox 360 controller on Ubuntu (Steam games, emulators or native games), however you must connect the Xbox 360 wireless controller to the wireless receiver (check the following section). Case you are experiencing problems (mapping or no-detected button), we recommend that you configure the controller.


How to connect the Xbox 360 controller to Ubuntu

Now that the Xbox 360 wireless receiver is installed and plugged, your next step is connect your wireless controller to the receiver. For that, do the following:

Step 1: Turn on the Xbox 360 controller (press and hold that GUIDE button in the center).

Step 2: Press and hold the button on the receiver (its light will start blinking).

Step 3: Press and hold the connect button on the top of the Xbox 360 controller.

Step 4: Wait until the light on the controller keeps blinking slowly (probably a bug on Linux).

After that, you will be able to use your Xbox 360 wireless controller on Ubuntu (and probably on others Linux distributions).

Just to improve the understanding, watch the video below showing how to connect the Xbox 360 controller to Ubuntu to play a Super Nintendo (ZSNES emulator) game (Alladin).


Configuring the Xbox 360 controller on Ubuntu

The packages installed early have an useful tool to help you configure your Xbox 360 controller, including remap function and a detection screen (it shows what you press). To access it, run the following command on terminal:

       jstest-gtk

It should show a window with four joysticks (see image below) even if you are connecting only one controller.

ubuntu xbox 360 controller joystick xboxdrv
Image 1: List of Xbox 360 controllers

Just select the first one on the list (configuring for player 1) and then click on "Properties". Now you have a new screen where you can test left stick, right stick, d-pad and the buttons. Also, if you are experiencing inverted buttons problem, or if you just want to remap buttons, there is the option "Mapping".

ubuntu xbox 360 controller joystick xboxdrv
Image 2: Tool to test and calibrate the Xbox 360 controller

Any question or suggestion, please use the comments section below.

Tutorial: How to Connect the Xbox 360 Controller to Windows


tutorial logo


Before start this tutorial, we would like to emphasize that the following instructions are for those who have a Xbox 360 wireless controller and would like to connect it to PC (should work on 7, Windows XP and Vista) to play your favorite games. It would be good if you read our Xbox 360 wireless receiver review, where you will know more about the Xbox wireless receiver before reading this tutorial.

Case you still do not have a Xbox 360 wireless receiver for Windows, you can buy it on Chinabuye for about $10 (also includes the driver CD for Windows 32/64 bits).

What are the requirements?

The following are the requirements that must be satisfied before proceeding on the tutorial:

  • You must have at least one Xbox 360 wireless controller.
  • You must have one Xbox 360 wireless receiver for Windows.
  • Your PC must have one USB 2.0 port ready to be used.
  • You must have the Xbox 360 wireless receiver driver for Windows (as mentioned early, they are included in the driver CD).

Note that we made this tutorial using Windows 7 (you will see Windows 7 images), but it is similar to Windows XP or Vista. Any doubt, use the comments.


Plugging the Xbox 360 wireless receiver for the first time

When plugging the Xbox 360 wireless receiver in a USB 2.0 port of your PC for the first time, Windows will try to install automatically the required driver for the device. It will probably fails on finding locally or on the Internet (see image 1), so you will have to point the Xbox wireless receiver driver manually.

windows fails finding xbox 360 controller receiver driver
Image 1: Windows fails on finding a Xbox wireless receiver driver

To install manually the receiver driver, follow these steps:

Step 1: After Windows fails in finding the proper driver, right click "Computer" and click on "Properties".

Step 2: Click on the option "Device Manager" (top-left).
For Windows XP, click on the "Hardware" tab and then click on the button "Device Manager".

Step 3: Under "Device Manager", and presuming that others devices on your PC are installed correctly, you will see on the list that only one item is not recognized (see image below). Right click on that item and then click on "Update Driver Software...".

windows device manager right click
Image 2: Right click on the unrecognized item

Step 4: Windows will ask how to search for the driver. Click on "Browse my computer for driver software" so you can point where are the drivers (see image below).

windows asks how to search the driver
Image 3: Windows asks how to search the receiver driver

Step 5: Now, click on the button "Browse" and choose the folder "USB Driver" located in the root of the driver CD (see image below). Then, click "Next". Windows will try to find proper drivers for your system (Windows version and 32/64 bits).

windows where to look for the driver
Image 4: Where are the drivers?

Step 6: After finding a driver, Windows will recheck if you really want to install that driver. It does that for security reason that we are not cover in this tutorial, but these are the drivers, so click on "Install this driver software anyway" to proceed (see image below).

windows check install driver
Image 5: Confirm you want to install this driver

Step 7: After that, Windows will successfully install the Xbox 360 wireless receiver driver, so you are ready to play (see image below).

xbox wireless receiver driver installed
Image 6: Xbox wireless receiver driver installed


How to connect the Xbox 360 wireless controller to PC (Windows)

Now that the Xbox 360 wireless receiver for Windows is installed and plugged, your next step is connect your wireless controller to the receiver. For that, do the following:

Step 1: Turn on the Xbox 360 controller (press and hold that GUIDE button in the center).

Step 2: Press and hold the button on the receiver (its light will start blinking).

Step 3: Press and hold the connect button on the top of the Xbox 360 controller.

Step 4: Wait until the lights (controller and receiver) stay on - that means both are connected.

If you want to use more than one wireless controller, just repeat steps 2, 3 and 4 for each wireless controller.

To confirm if the wireless controller(s) is working properly, there is the "Game Controllers" option. You can access it by typing "joystick" on the start menu (Windows will find some options) and then clicking on the "Set up USB game controllers". There, you will be able to see if the left stick, right stick, d-pad and buttons are working properly and also how many wireless controllers were recognized (see image 7).

windows joystick panel
Image 7: Test your joysticks here

Just to improve the understanding, watch the video below showing how to connect the Xbox 360 controller to Windows 7 to play a Steam game (Renegade Ops).

Any question or suggestion, please use the comments section below.

Xbox 360 Wireless Receiver Review


xbox 360 wireless receiver review xbox 360 wireless receiver review xbox 360 wireless receiver review xbox 360 wireless receiver review xbox 360 wireless receiver review xbox 360 wireless receiver review xbox 360 wireless receiver review xbox 360 wireless receiver review xbox 360 wireless receiver review xbox 360 wireless receiver review xbox 360 wireless receiver review


Presentation of the Xbox 360 Wireless Receiver

In this review we would like to present to you a Xbox 360 wireless receiver that we received from Chinabuye (SKU:23243). With this device, you can connect a Xbox 360 wireless controller on PC (Windows and Linux) and also on Android devices (smartphones and tablet). Note that this Xbox 360 gaming receiver is only required if you want to use a Xbox 360 wireless controller (not the wired controller).

The product package comes with the following items:

  • Xbox 360 wireless gaming receiver (160cm of USB cable).
  • Driver CD (drivers for Windows 32/64 bits, PDF with installation instructions and the "Microsoft Xbox 360 Accessories" software).

To use the Xbox 360 wireless receiver, the following tasks must be done:

  • Step 1: Plug the PC wireless gaming receiver in a USB 2.0 port. (*)
  • Step 2: Turn on the Xbox 360 controller (press and hold that GUIDE button in the center).
  • Step 3: Press and hold the button on the receiver (its light will start blinking).
  • Step 4: Press and hold the connect button on the top of the Xbox 360 controller.
  • Step 5: Wait until the lights (controller and receiver) stay on - that means both are connected. (**)


How to connect a Xbox 360 Wireless Controller to Windows or Ubuntu

If it is the first time plugging it, it probably will be necessary to install the Xbox 360 wireless receiver driver. For Windows users, there is the CD included in the package with drivers for Windows 32 or 64 bits (XP, Vista or Seven). For new Ubuntu users (***), the receiver probably will work as soon as you connect it, but know that there are tools to ease the task.

Case you need installation instructions, check the proper tutorial link just below:


Testing the Xbox 360 Wireless Receiver

As usual, we prepared some tests to see the capabilities of the product. For this Xbox 360 wireless receiver, we tested if a gamer is able to use it in different OS's (Windows and Ubuntu), how far is the wireless range, which type of application it is compatible and if it is possible to use more than one Xbox 360 controller on the receiver.


Testing the connectivity in different OS's (Windows and Ubuntu)

We tested it and confirmed working on the following OS's:

  • Windows XP SP3 - 32 bits.
  • Windows 7 - 64 bits.
  • Ubuntu 12.10 - 32 bits.


Testing the wireless range of the Xbox 360 Wireless Receiver

For this test, we just connected one Xbox 360 controller to the PC wireless gaming receiver and move the controller away to see how far it works. It was able to keep working in a distance about 7.5 meters (batteries fully charged and with walls obstacles).

You probably will not use the Xbox 360 controller far away from the PC wireless gaming receiver, but we made this test and put it on this review just in case someone needs that info.


Testing the Xbox Gaming Receiver in different applications

Probably a gamer want to use this gaming receiver to play Steam games or emulators games on PC. So, we tested it in these two situations. Both worked fine (plug and play) without the need of extra configuration (emulators need mapping). However, case you encounter some game/emulator with Xbox 360 controller compatibility issue, know that there are softwares like Xpadder and MotionInJoy to try to fix some problems.


Testing if more than one Xbox 360 Controller can be used simultaneously

This one is for those who like to play games with friends. We managed to test 3 (three) Xbox 360 controllers with this Xbox 360 gaming receiver and all of them worked fine (simultaneously) on GoldenEye 007 (Mupen64 - Nintendo 64 emulator) and Cadillacs and Dinosaurs (Kawaks - arcade emulator).

Unfortunately, we were unable to test if this PC wireless gaming receiver works with the Xbox 360 Wireless Racing Wheel and Xbox Wireless headset (we do not own them).


Where can I buy this Xbox 360 Wireless Receiver?

This Xbox gaming receiver is on sale for about $10 at Chinabuye, more specifically in this link.


Note 1: Pay attention if you are not plugging it in a USB 1.1 port (generally those front panel USB ports on older PC's).

Note 2: Under Linux, only the receiver light will stay on. The controller light will keep blinking, but you will be able to use the Xbox 360 controller anyway.

Note 3: Distros with kernel +2.6.26 (or newer) probably already come with the new xpad module.

Credit Card USB Flash Drive 8GB Review (7 different notes)

credit card usb flash drive 8gb review credit card usb flash drive 8gb review credit card usb flash drive 8gb review credit card usb flash drive 8gb review credit card usb flash drive 8gb review credit card usb flash drive 8gb review credit card usb flash drive 8gb review credit card usb flash drive 8gb review credit card usb flash drive 8gb review


In this review we would like to talk about a credit card USB flash drive that we received from Chinabuye (SKU:13097). As you probably noticed, this 8GB flash drive has a credit card style, which means dimensions very similar to a real credit card (see comparison in the images above), so you can put it in your wallet without worrying about the thickness. Also, it has a bank note drawed on it (7 types detailed just below). In other words, it is one of those cool USB flash drives to carry.

On the product's page, before adding it to cart, you can choose one of the 7 different notes:

  • 100 dollar note (USD) - the one that we received
  • 100 euro note (100EURO)
  • 500 euro note (500EURO)
  • 100 Chinese renminbi (RMB)
  • 500 Indian rupee (INR)
  • 500 Hong Kong dollar (HKD)
  • 1000 Uruguayan pesos (UYU)

Check the video below to understand the credit card USB flash drive concept.


Build Quality

It is made of plastic and its rigidity is similar to a conventional credit card, so the care should be the same. The drawings on the notes are very similar to real notes, but you may find some little differences (insignificant).

Since it has a rotative mechanism (see video above), it will be easier to fit it in tight spaces closes to the USB port of your computer, including the back where there is a lot of cables.


Speed test of the Credit Card USB Flash Drive 8GB

For this USB flash drive (8GB version), we made a speed test using the software USBDeview (write speed and read speed). The results are:

  • Write Speed: 4.55 MB/sec
  • Read Speed: 14.54 MB/sec


Where can I buy this Credit Card USB Flash Drive

We just reviewed the 8GB model, however Chinabuye also sells models of different capacity (4GB, 16GB and 32GB) with the same dimensions and notes (100 dollar, 100 euro, 500 euro, 500 Indian rupee, 1000 Uruguayan pesos, 100 Chinese Renminbi and 500 Hong Kong dollar). So, choose the credit card USB flash drive more appropriated to your needs.